Winter can be very challenging for RV owners. As a travel trailer owner, knowing how to winterize a travel trailer is essential, especially if you’re new to the RV lifestyle.
One of the first RVing problems we encountered early was due to lack of winterization. As a newcomer to the RVing world, we weren’t familiarized with the process and the need to winterize our travel trailer .
This mistake cost us a fortune, and as soon as winter was over, our propane tank was gone, and our plumbing system was completely damaged as a result of water freezing in them. We had no choice but to begin repairing and replacing the damaged parts.
Don’t let this happen to you. Winter will soon be upon us. Wintering your rig can be a little time-consuming, but putting in the work always pay off, provided you have the right tools and knowledge.
To continue exploring new destinations and maximizing your outdoor experience, winterizing your travel trailer will secure your leisure and investment.
Steps on How to Winterize an RV or Travel Trailer
Now, let’s quickly dive into how to winterize a travel trailer.
Step 1: Clean and Inspect All Parts
Before winterizing your travel trailer, spend some quality time cleaning and inspecting both the interior and exterior of your trailer.
This step is the first because you want to avoid dirt or other elements that could interfere with the process.
Start by removing food items or debris from the trailer’s interior to prevent mold or mildew growth during winter.
Check thoroughly for any signs of damage – it might be as little as cracks in the walls or floors; see if there are leaks in the roof or possible worn-out tires.
Ensure to properly seal all windows and doors to avoid any drafts or leaks.
Use a mixture of clean water and detergent to remove all accumulated dirt from the exterior of your travel trailer over time.
Remember to inspect the roof, awning, and other exterior parts for any signs of wear and tear.
Spending quality time to inspect and clean your travel trailer will be worth it, as you’ll be able to spot any issues you can’t help but address before winterizing.
This approach will ensure that your trailer stays in good condition throughout the off-season and is ready to use when the camping season returns.
Step 2: Disconnect Batteries and Electrical Appliances
The next step is disconnecting your batteries and electrical appliances to prevent drainage and damage during storage.
Since the storage period can drag on, disconnect the batteries, including the solar panels connected to your trailer.
Disrupt and turn off your batteries, solar panels, and all electrical components, including lights, appliances, and air conditioning.
Store the RV batteries in a cool, dry place, preferably on a battery tender, to maintain their charge.
Disconnect the solar panels by removing the positive and negative cables.
Cover the solar panels with a protective cover to prevent external interference during storage.
Always remember to label all cables for easy reconnection.
Step 3: Drain and Clean Waste Water Tanks
Next, drain your black and grey water tanks and clean them thoroughly to prevent any buildup or odors.
Start by locating the valves for your black and grey water tanks.
Connect your sewer hose to the appropriate tank valve and channel the other end into a nearby portable tank.
Open the black water tank valve first, and allow the water to drain completely. It’s essential to empty the black tank before the grey water tank since the grey water can help flush out any remaining waste.
After draining the black water tank, open the valve for the grey tank to drain. Open the sink and shower faucets to ensure both tanks have no water whatsoever.
Once the tanks are empty, add a cleaning solution following the manufacturer’s guidelines. Typically, you’ll pour a measured quantity of the solution into your toilet bowl and flush it into your black water tank.
Allow the cleaning substance to sit in the tanks for some time. This step is crucial for removing any buildup or odors.
After the substance has had time to work in the tanks, drain the tanks again, ensuring all the cleaning solution is flushed out. You may need to rinse the tanks a few times to ensure they are spotless.
Disconnect your sewer hose and keep it away from your freshwater hose to avoid cross-contamination.
Properly draining and cleaning your waste water tanks will prevent unpleasant odors or buildup from developing during the winter months.
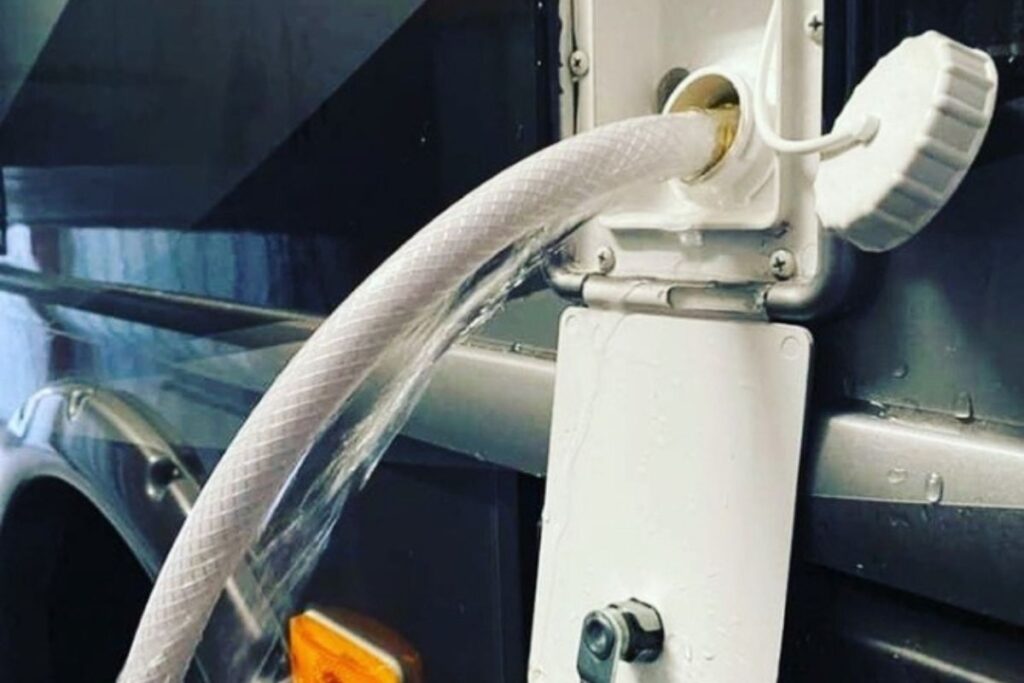
Step 4: Drain Fresh Water Tank and Water Lines
Next, drain your fresh water tank and all water lines. Apply compressed air to blow out any remaining water from the pipes.
Follow the steps below.
Turn off the water pump and release pressure through all faucets and valves.
Locate and connect a hose to the freshwater tank drain valve.
Allow all of the water to drain by opening the drain valve.
Close the drain valve, then remove the hose once the tank is empty.
Next, locate your water lines’ low-point drain valves. There could be more than one, so it would make sense to consult your manual to see how it’s done or let a professional put you through it if you need clarification.
Allow all of the water to drain by opening the low-point drain valves. Though it depends on your type of travel trailer, and in most cases, you will need a wrench to open the valves.
Close the low-point drain valves and disconnect any hoses or attachments used to drain the water once all of the water has completely drained.
Finally, blow out any remaining water from the lines with compressed air. Connect an air compressor to the city water inlet and blow out each line until there is no more water.
Begin at the closest faucet to the water pump and work outward.
Step 5. Bypass the Water Heater
The next thing in this stage is to turn off the water heater. This is required to prevent antifreeze from circulating in the water heater.
First, turn off the water heater and allow it to cool.
Locate your travel trailer’s bypass valve. This valve is typically found near the water heater or in the water lines that lead to and from the water heater.
Set the bypass valve to “bypass” mode. This will redirect water flow around the water heater, preventing antifreeze from passing through it.
Step 6: Drain the Water Heater
The next thing in this stage is to turn off the water heater. This is required to prevent antifreeze from circulating in the water heater.
First, turn off the water heater and allow it to cool.
Locate your travel trailer’s bypass valve. This valve is typically found near the water heater or in the water lines that lead to and from the water heater.
Set the bypass valve to “bypass” mode. This will redirect water flow around the water heater, preventing antifreeze from passing through it.
Step 7: Add Antifreeze to the Plumbing System
After bypassing the water heater, now add antifreeze to the piping system. This is done by injecting antifreeze into the plumbing system with a hand pump or a water pump conversion kit. You can check out your manual for the perfect amount for your trailer.
Pour antifreeze into the tank after finding the fresh water fill port on the trailer’s outside.
Turn on the water pump and keep it running until the antifreeze drains from all taps and drain valves. This ensures that the antifreeze has completely replaced the water.
Step 8. Flush the Toilet and Run the Faucets
After applying the antifreeze to the plumbing system, allow it to sit for a while; now, flush the toilet and run the faucets to make the antifreeze reach all system regions.
Turn on all faucets, including the shower, and leave them running until pink antifreeze appears.
Flush the toilet often to ensure antifreeze is present in the bowl and tank.
Run the hot water faucets to confirm that the hot water lines are antifreeze-filled.
Make sure to flush any outdoor showers with antifreeze.
After ensuring that antifreeze has reached all parts of the plumbing system, turn off all taps and close the toilet valve.
Dos and Don’ts of Winterization
Winterizing a travel trailer has its own dos and don’ts, like several other things. These dos and don’ts matter greatly; you should prioritize them to maintain your trailer.
Dos:
Do follow the manufacturer’s guidelines for winterization.
Do use non-toxic antifreeze.
Do store your travel trailer in a dry, covered location.
Do inspect your travel trailer regularly during the winter months.
Don’ts:
Don’t use automotive antifreeze.
Don’t forget to drain all water.
Don’t forget to disconnect your travel trailer’s batteries and solar panels before the winterization process.
Don’t store your travel trailer without properly cleaning and inspecting the interior and exterior first.
Most Common Mistakes When Winterizing a Travel Trailer
There are several mistakes people make when winterizing a travel trailer. Here are some of the most common winterizing mistakes you want to avoid:
Not draining and cleaning waste water tanks before winterizing.
Using regular automobile antifreeze rather than RV antifreeze.
Failure to properly disconnect batteries and solar panels before winterization.
Allowing water to remain in the plumbing system.
Failure to thoroughly clean and check the interior and exterior of the travel trailer before storing it.
Placing the travel trailer in an unsafe area without covering or adequately securing it.
Conclusion
Winterizing your travel trailer is critical to protecting it from harsh winter weather and avoiding costly damage. If you follow these walk-in, step-by-step guides, you’ll see that your travel trailer is winterized correctly and ready to use again in the spring.
Remember to thoroughly inspect your travel trailer, unplug the batteries and solar panels, drain and clean all water tanks and pipes, and store it appropriately. Following the dos and don’ts and avoiding common errors will help you complete the winterization procedure successfully.
FAQs
How hard is it to winterize a travel trailer?
Winterizing a travel trailer is not hard; it can be a bit straightforward process; however, it can also be time-consuming and require thorough attention.
What Happens if You Don’t Winterize Your Travel Trailer?
When you fail to winterize your travel trailer, you risk damaging your plumbing system, water heater, propane, electrical system, and other vital components. The havoc starts with water freezing, expanding, and causing damage to every element it’s in contact with.
This often results in costly repairs when fixing the damaged components. Fixing these components is inevitable. Trust me; you want to hit the road with them since they make up the must-have accessories for a travel trailer.
How Much Does It Cost to Winterize a Travel Trailer?
Winterizing a travel trailer costs between $50 and $300. But the final cost can also vary, depending on whether you do the winterization yourself or hire a professional.
If you handle the winterization process independently, procuring the equipment and materials necessary for the task can cost between $50 and $100 or surpass that threshold.
But, if you assign the tasks to a professional, you might spend between $100 and $300, but this also depends significantly on external factors like your RVing location and the size of your travel trailer.
What are the Tools You Need to Winterize Your Travel Trailer?
To winterize your travel trailer, these tools and materials must be available:
- RV antifreeze
- Water pump
- Compressed air
- Water heater bypass kit
- Water pressure regulator
- Wrenches and pliers
- Screwdriver
- Rubber gloves
How cold can it get before I winterize my travel trailer?
Ideally, you should winterize your travel trailer when the temperature reaches 32°F or 0°C.
How long can a travel trailer stay winterized?
A travel trailer can stay winterized as long as it is adequately prepared for storage without leaving any droplets of water in the lines and tanks.
Related
7 Best Cold Weather Travel Trailers
7 Winter RV Living Tips: How We Stay Warm All Winter in our RV
How long does it take to winterize a travel trailer
The time it takes to winterize a travel trailer is determined by the RV’s complexity and the extent of the winterization process. It might take 30 minutes to several hours to thoroughly winterize a trailer. However, it is critical not to speed up the procedure in order to avoid missing any critical steps.
Can I use regular antifreeze instead of RV antifreeze?
No, regular antifreeze is harmful and should not be used in potable water systems. When winterizing your travel trailer, always apply dedicated RV antifreeze.
Do I need to winterize my travel trailer if I live in a mild climate?
Certainly, even if you live in a temperate region, winterizing your trailer is always a brilliant idea. Freezing temperatures are still possible, and it is always better to be safe than sorry.
How often should I winterize my travel trailer?
It’s important to winterize your travel trailer once a year before the winter months begin.
Can I skip bypassing the water heater during the winterizing process?
No, bypassing the water heater during the winterizing process is critical to prevent antifreeze from circulating the water heater.